
What This Is
I wanted a Pi 5 that didnt rely on an SD card. SD cards die, theyre slow, and running actual services off one is asking for trouble. The plan was simple: PCIe HAT + cheap NVMe SSD = something that feels like a real computer.
The end goal was Pi-hole for network-wide ad blocking, plus Prometheus and Grafana because I like pretty graphs.
The Parts
- Raspberry Pi 5 (4GB or 8GB, I forget which)
- PCIe to M.2 NVMe HAT - the kind with a built-in fan
- ORICO D10 128GB NVMe SSD - cheap, small, enough for a few services
- Some random 3D printed case I found online
Thats it. No soldering, no special tools.
The Build
HAT Installation
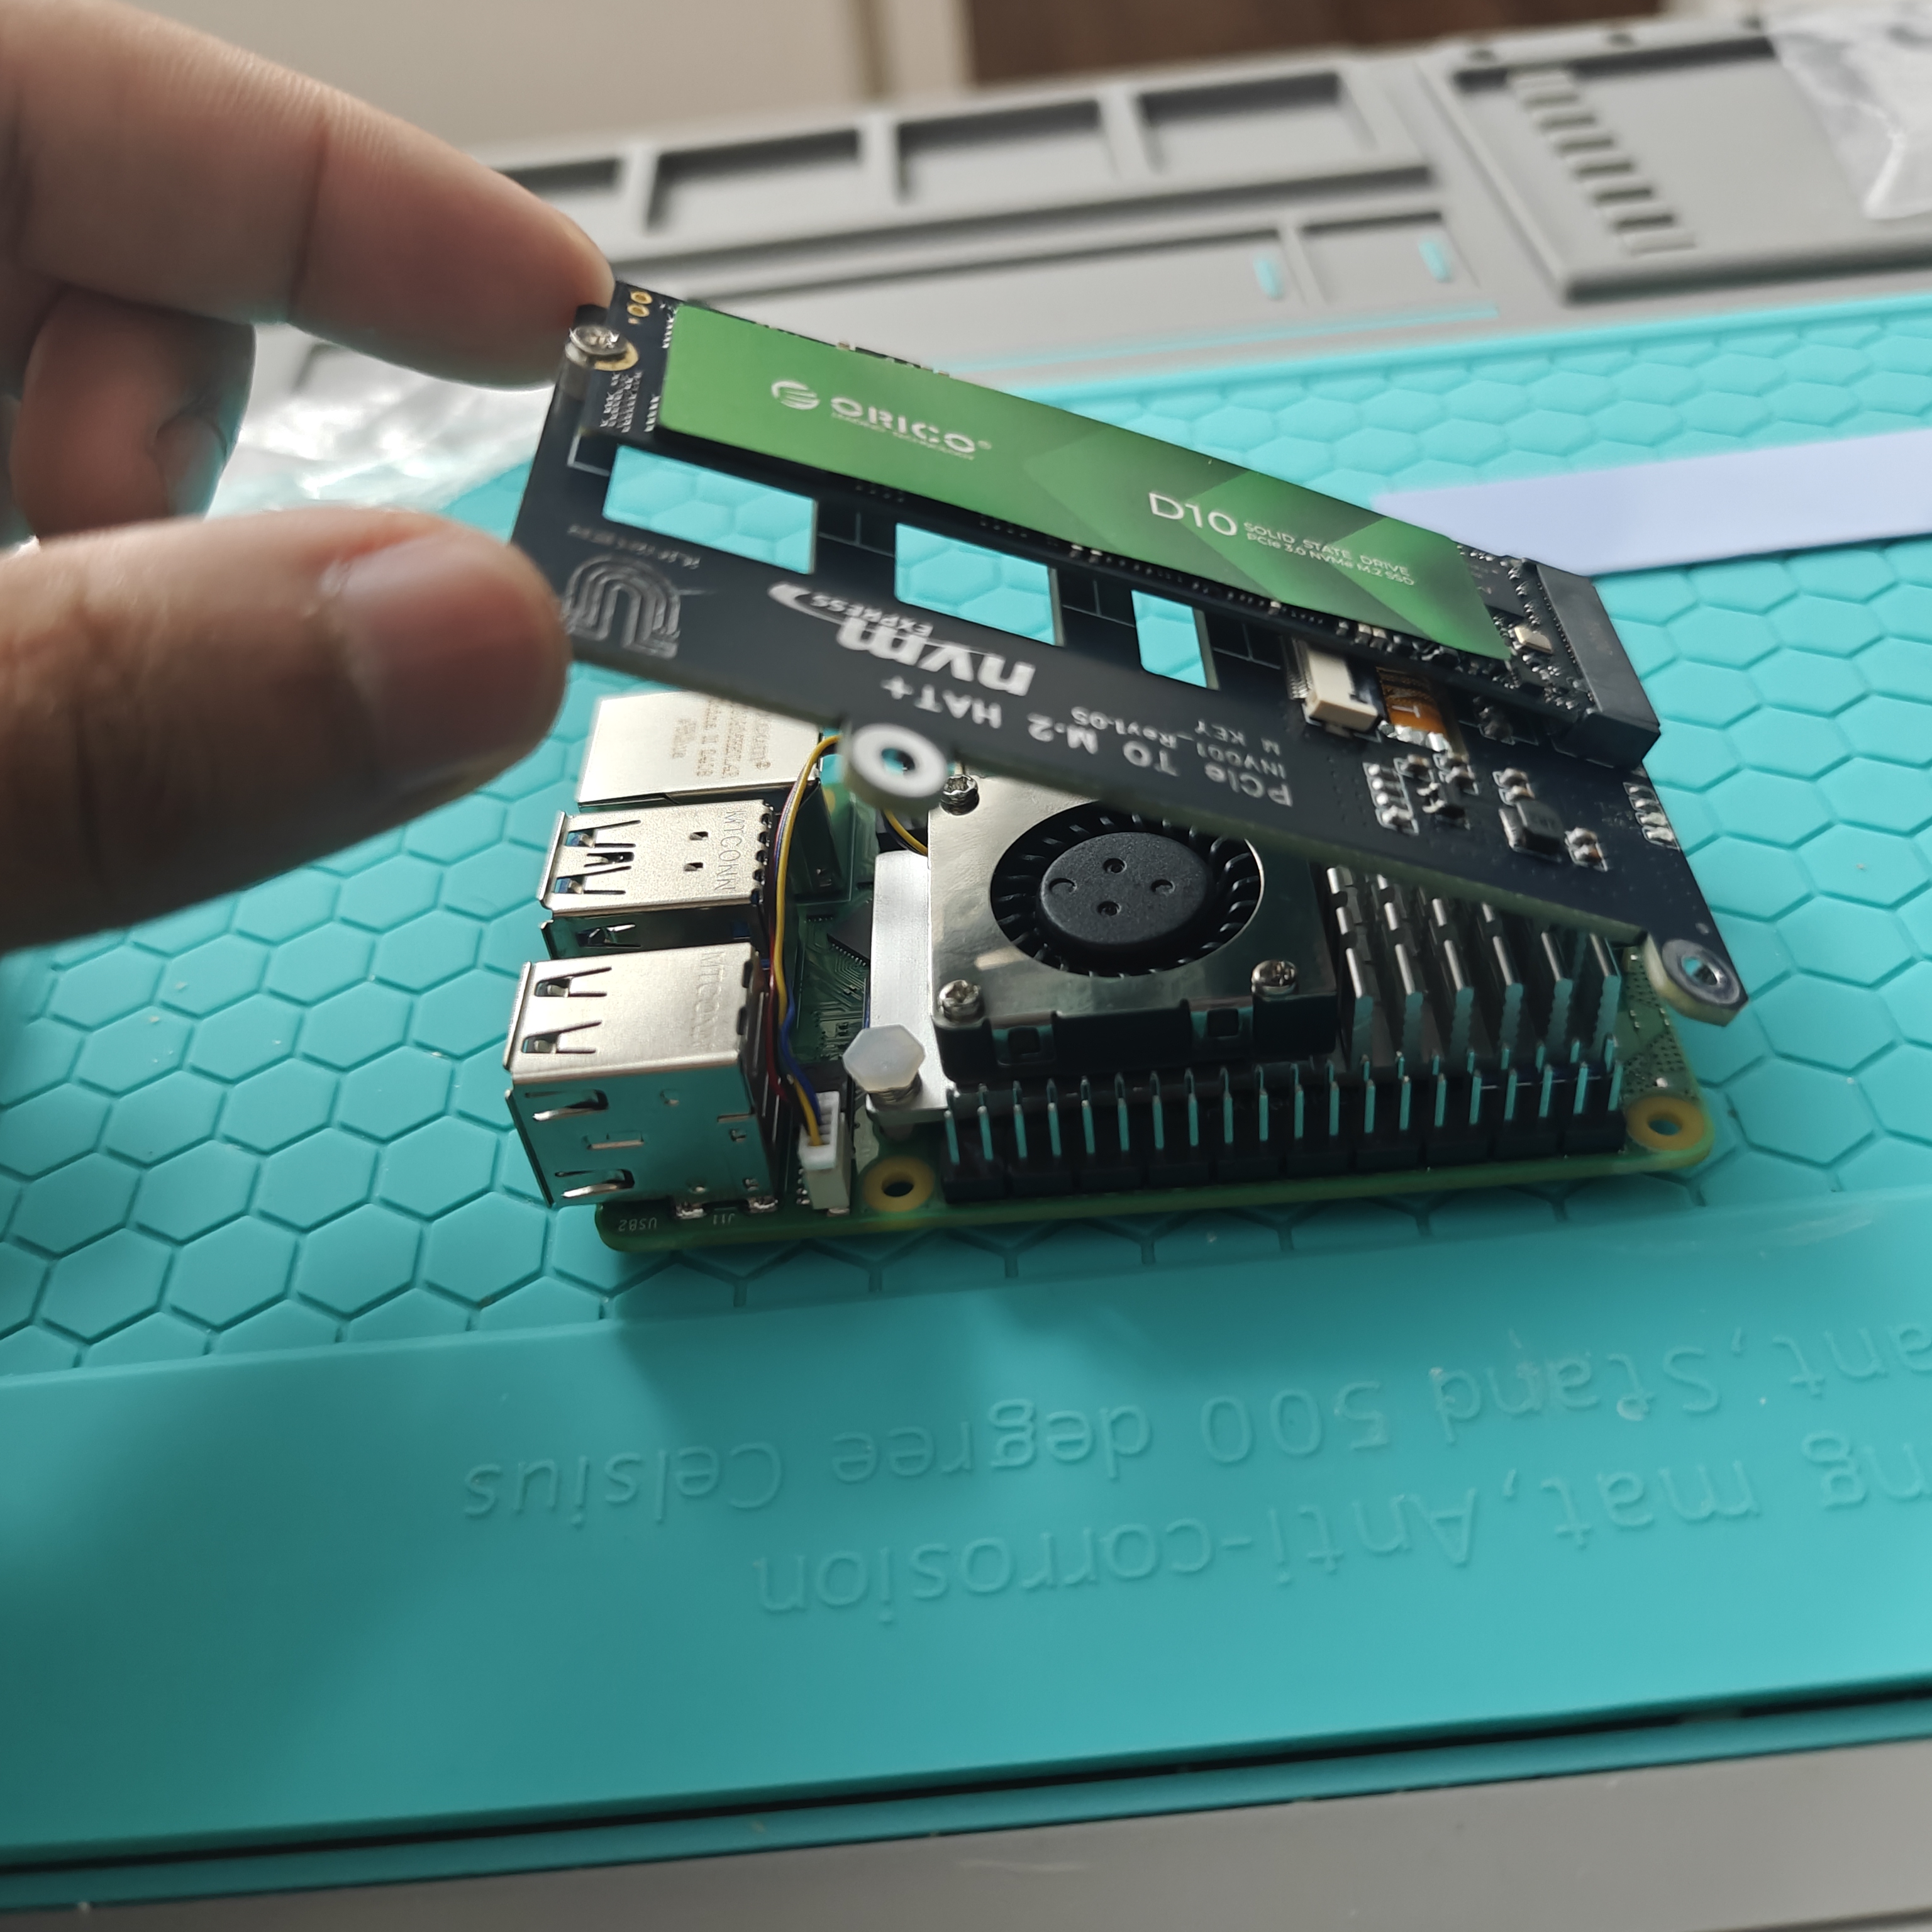
The HAT plugs into the 40-pin GPIO header and taps the PCIe lane hiding underneath. Slide the NVMe into the M.2 slot at an angle, screw it down, done. The fan mounts on top and handles both the Pi’s SoC and the SSD.
The Pi 5 has a PCIe 2.0 x1 lane. Thats about 500MB/s max. Not fast by desktop standards but roughly 10x what an SD card can do.
Case Problems

Heres where I hit the first snag. The HAT adds about 25mm of height. Most Pi 5 cases dont account for this at all. I tried a few designs from Printables and MakerWorld. The ones with the Raspberry Pi logo cutout looked great but the HAT wouldnt fit inside.
Ended up using a modified case where the top panel is basically just a decorative build plate sitting loose on top. Not elegant but it works. The stack from bottom to top is Pi PCB, GPIO connector, HAT board, M.2 SSD, fan. Total height around 40mm.

Final Assembly
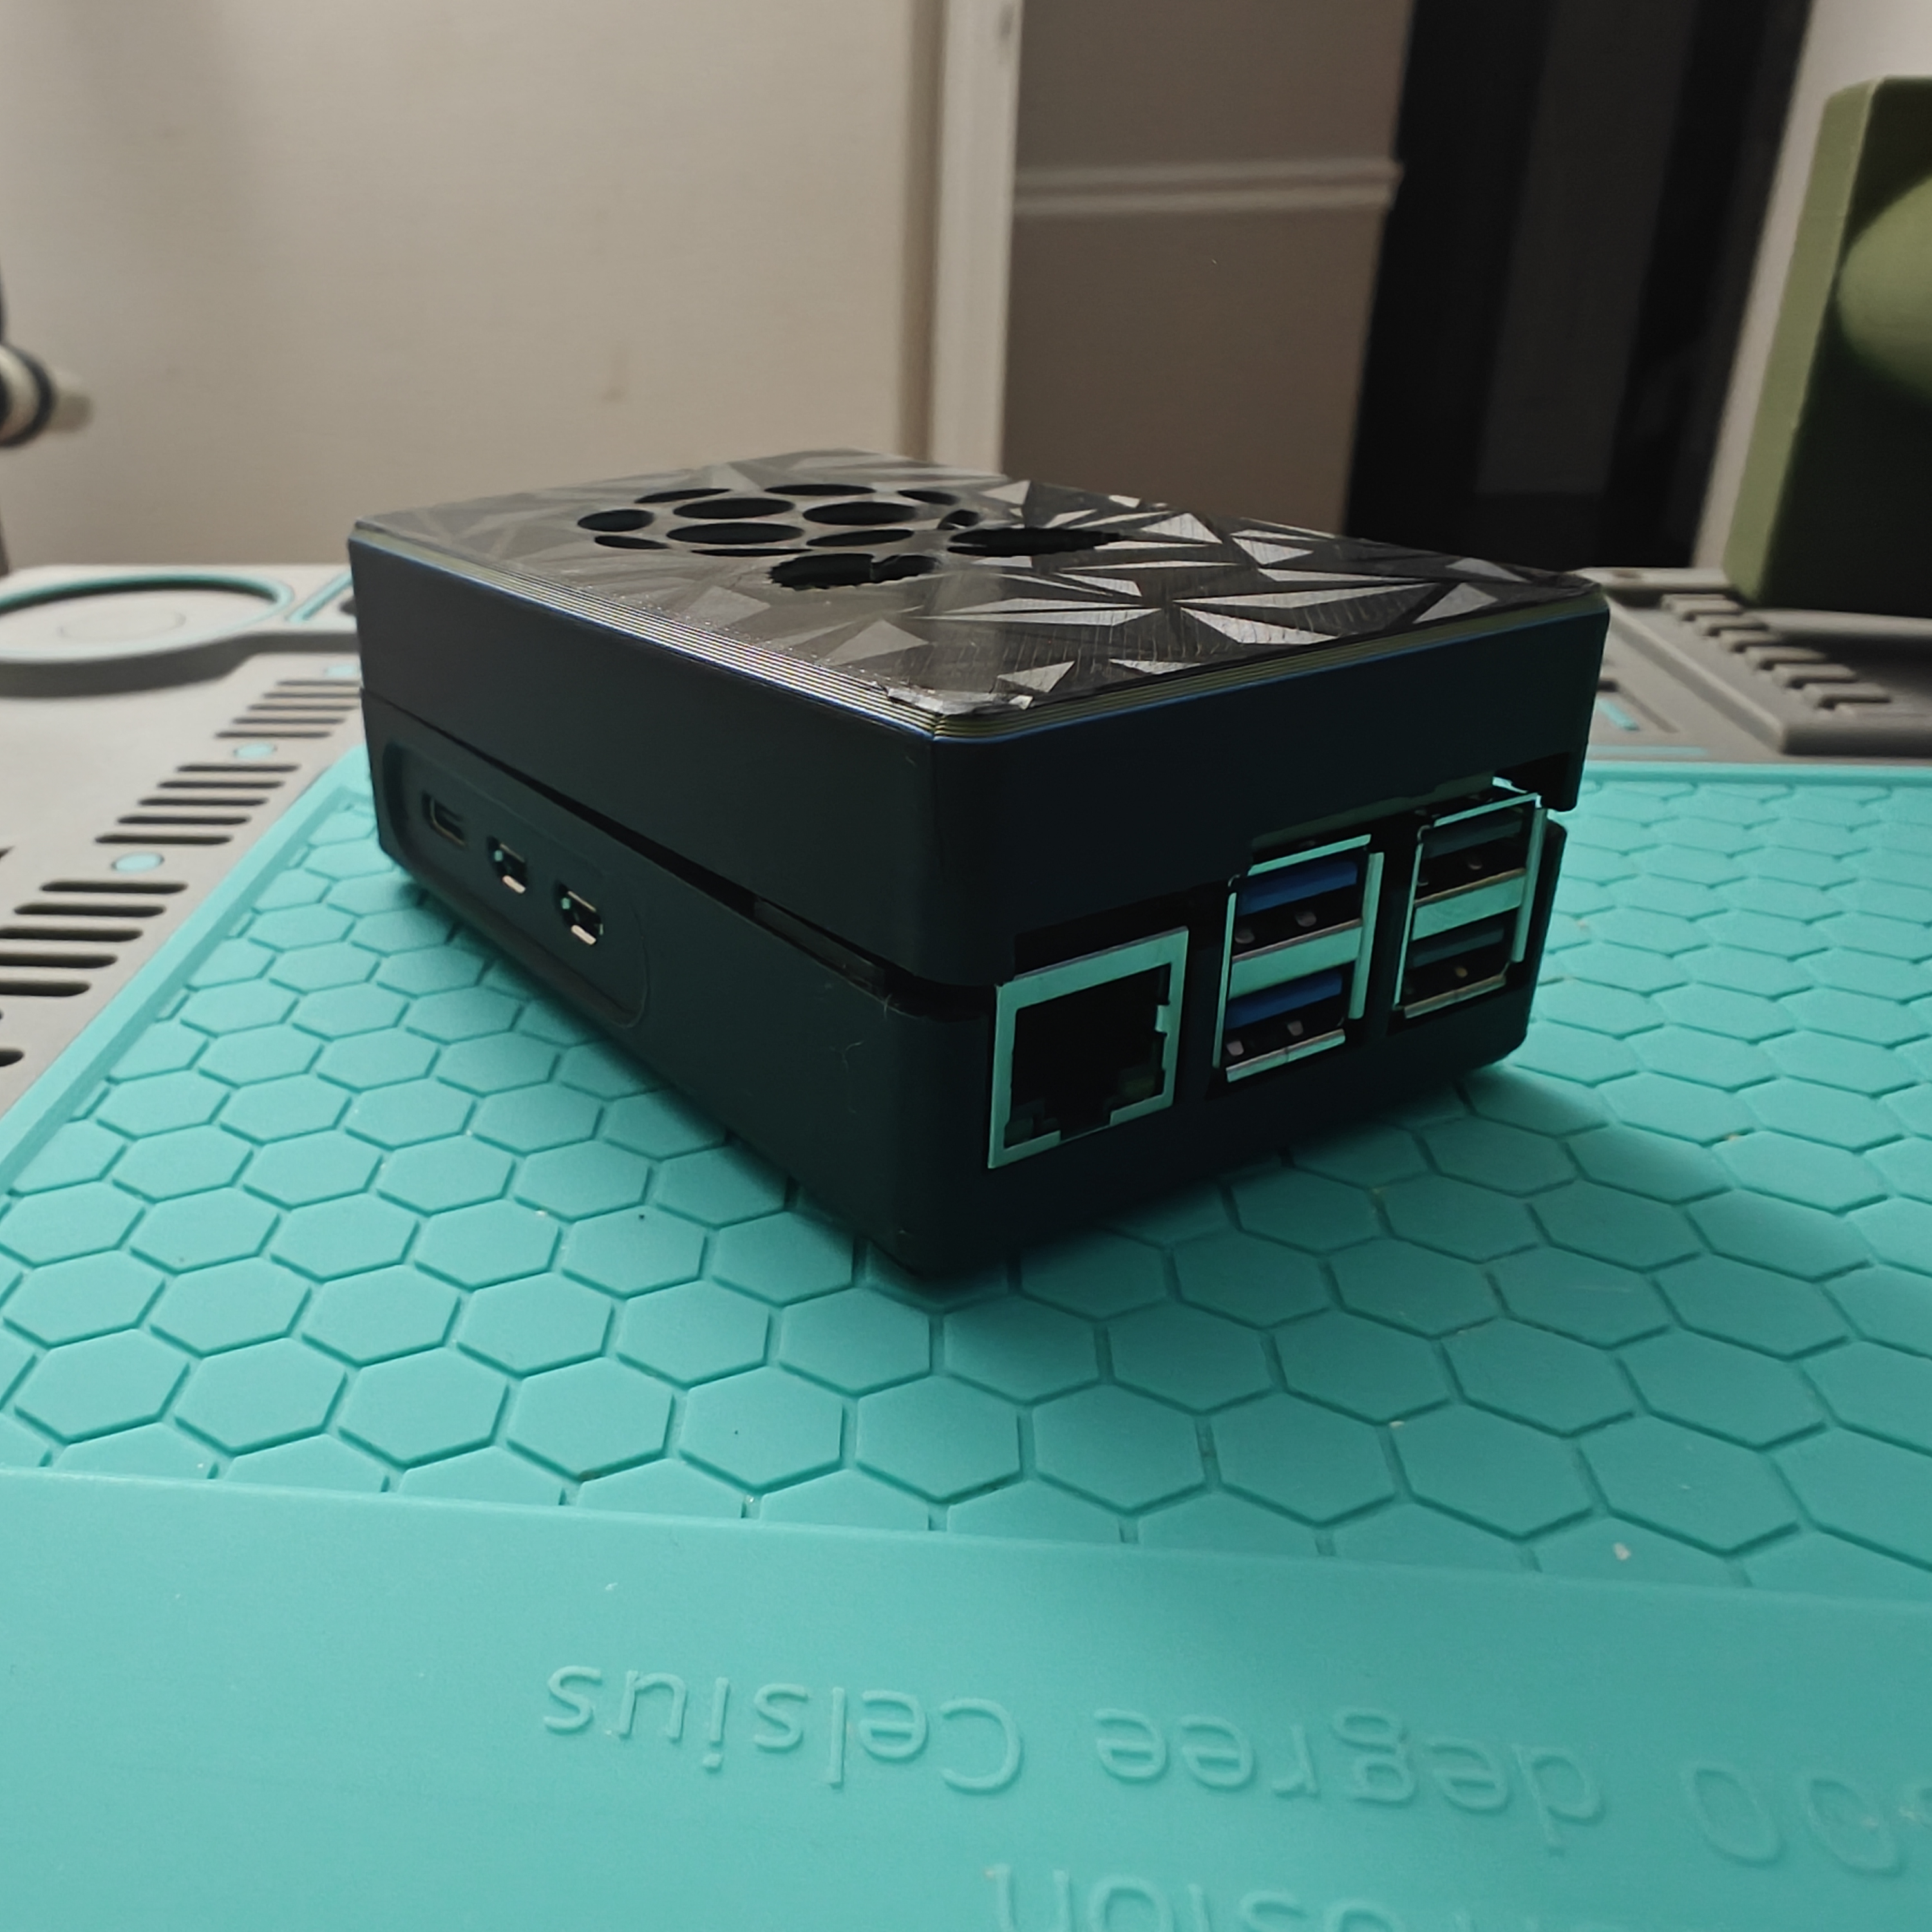
All ports still accessible. Fan has room to breathe. Its not winning any beauty contests but it sits on a shelf and does its job.
Performance
NVMe over PCIe 2.0 x1 is a massive jump from SD card. Were talking roughly 450MB/s sequential read versus maybe 50MB/s on a good SD card. Random IOPS is where it really shows - thousands instead of hundreds.
For the stuff I planned to run, that matters. Docker containers start faster. Database queries dont hang. System updates finish in seconds instead of minutes.
Power draw is basically nothing. Idle around 4W, maybe 8W under load, peaking at 12W during boot. Costs maybe 6 bucks a year to run 24/7.
What I Planned to Run
Pi-hole - One-line install, network-wide ad blocking. Done this before. Works great on a Pi.
Prometheus + Grafana - Metrics collection and dashboards. More resource-hungry but the NVMe handles it fine.
I had the hardware together but at the time of writing this the software stack was still on the todo list.
What Worked
- NVMe is genuinely 10x faster than SD. No exaggeration.
- The HAT fan keeps everything cool. No throttling.
- Assembly took maybe an hour. Mostly fumbling with the case.
What Didnt
- Case compatibility is a pain. Most Pi 5 cases assume no HAT.
- The HAT + SSD adds about 60-80 bucks to the build.
- You need a decent 5V/5A PSU. The cheap ones struggle.
Final Word
For 60 bucks extra the HAT + NVMe combo turns the Pi 5 from a toy into something you can actually run services on. The case situation is annoying but solvable. If youre doing anything more than a light script or two, skip the SD card. Its worth it.
Build date: October 2025 Status: Hardware done, software stack pending


