
What This Is
I was in Bangladesh in May 2023 with an HP EliteBook 840 G7 that had a cracked screen. Only about 30% of the display was still viewable. Instead of trashing it or paying for a replacement panel, I tore it down, upgraded what I could, and eventually superglued the motherboard to the back of a monitor.
The workspace was cramped. Hot. I had a basic iFixit kit and not much else. This project was equal parts repair and improvisation.
The Setup
Limited desk space meant overlapping keyboards and making do. Full-size mech on the left, the EliteBook on the right, Rapoo wireless mouse, dark desk surface. Not ideal but it worked.
Primary monitor was a 27-inch desktop display. Big TV mounted above for reference. Upper shelf had notebooks and random desk stuff. Drawer unit for screws and small parts.
Green ambient lighting from the AC unit. Terrible for precision work but it was 35C outside so the AC stayed on. Notebook for handwritten notes, yellow folder with references, screwdriver set within reach.
The Teardown
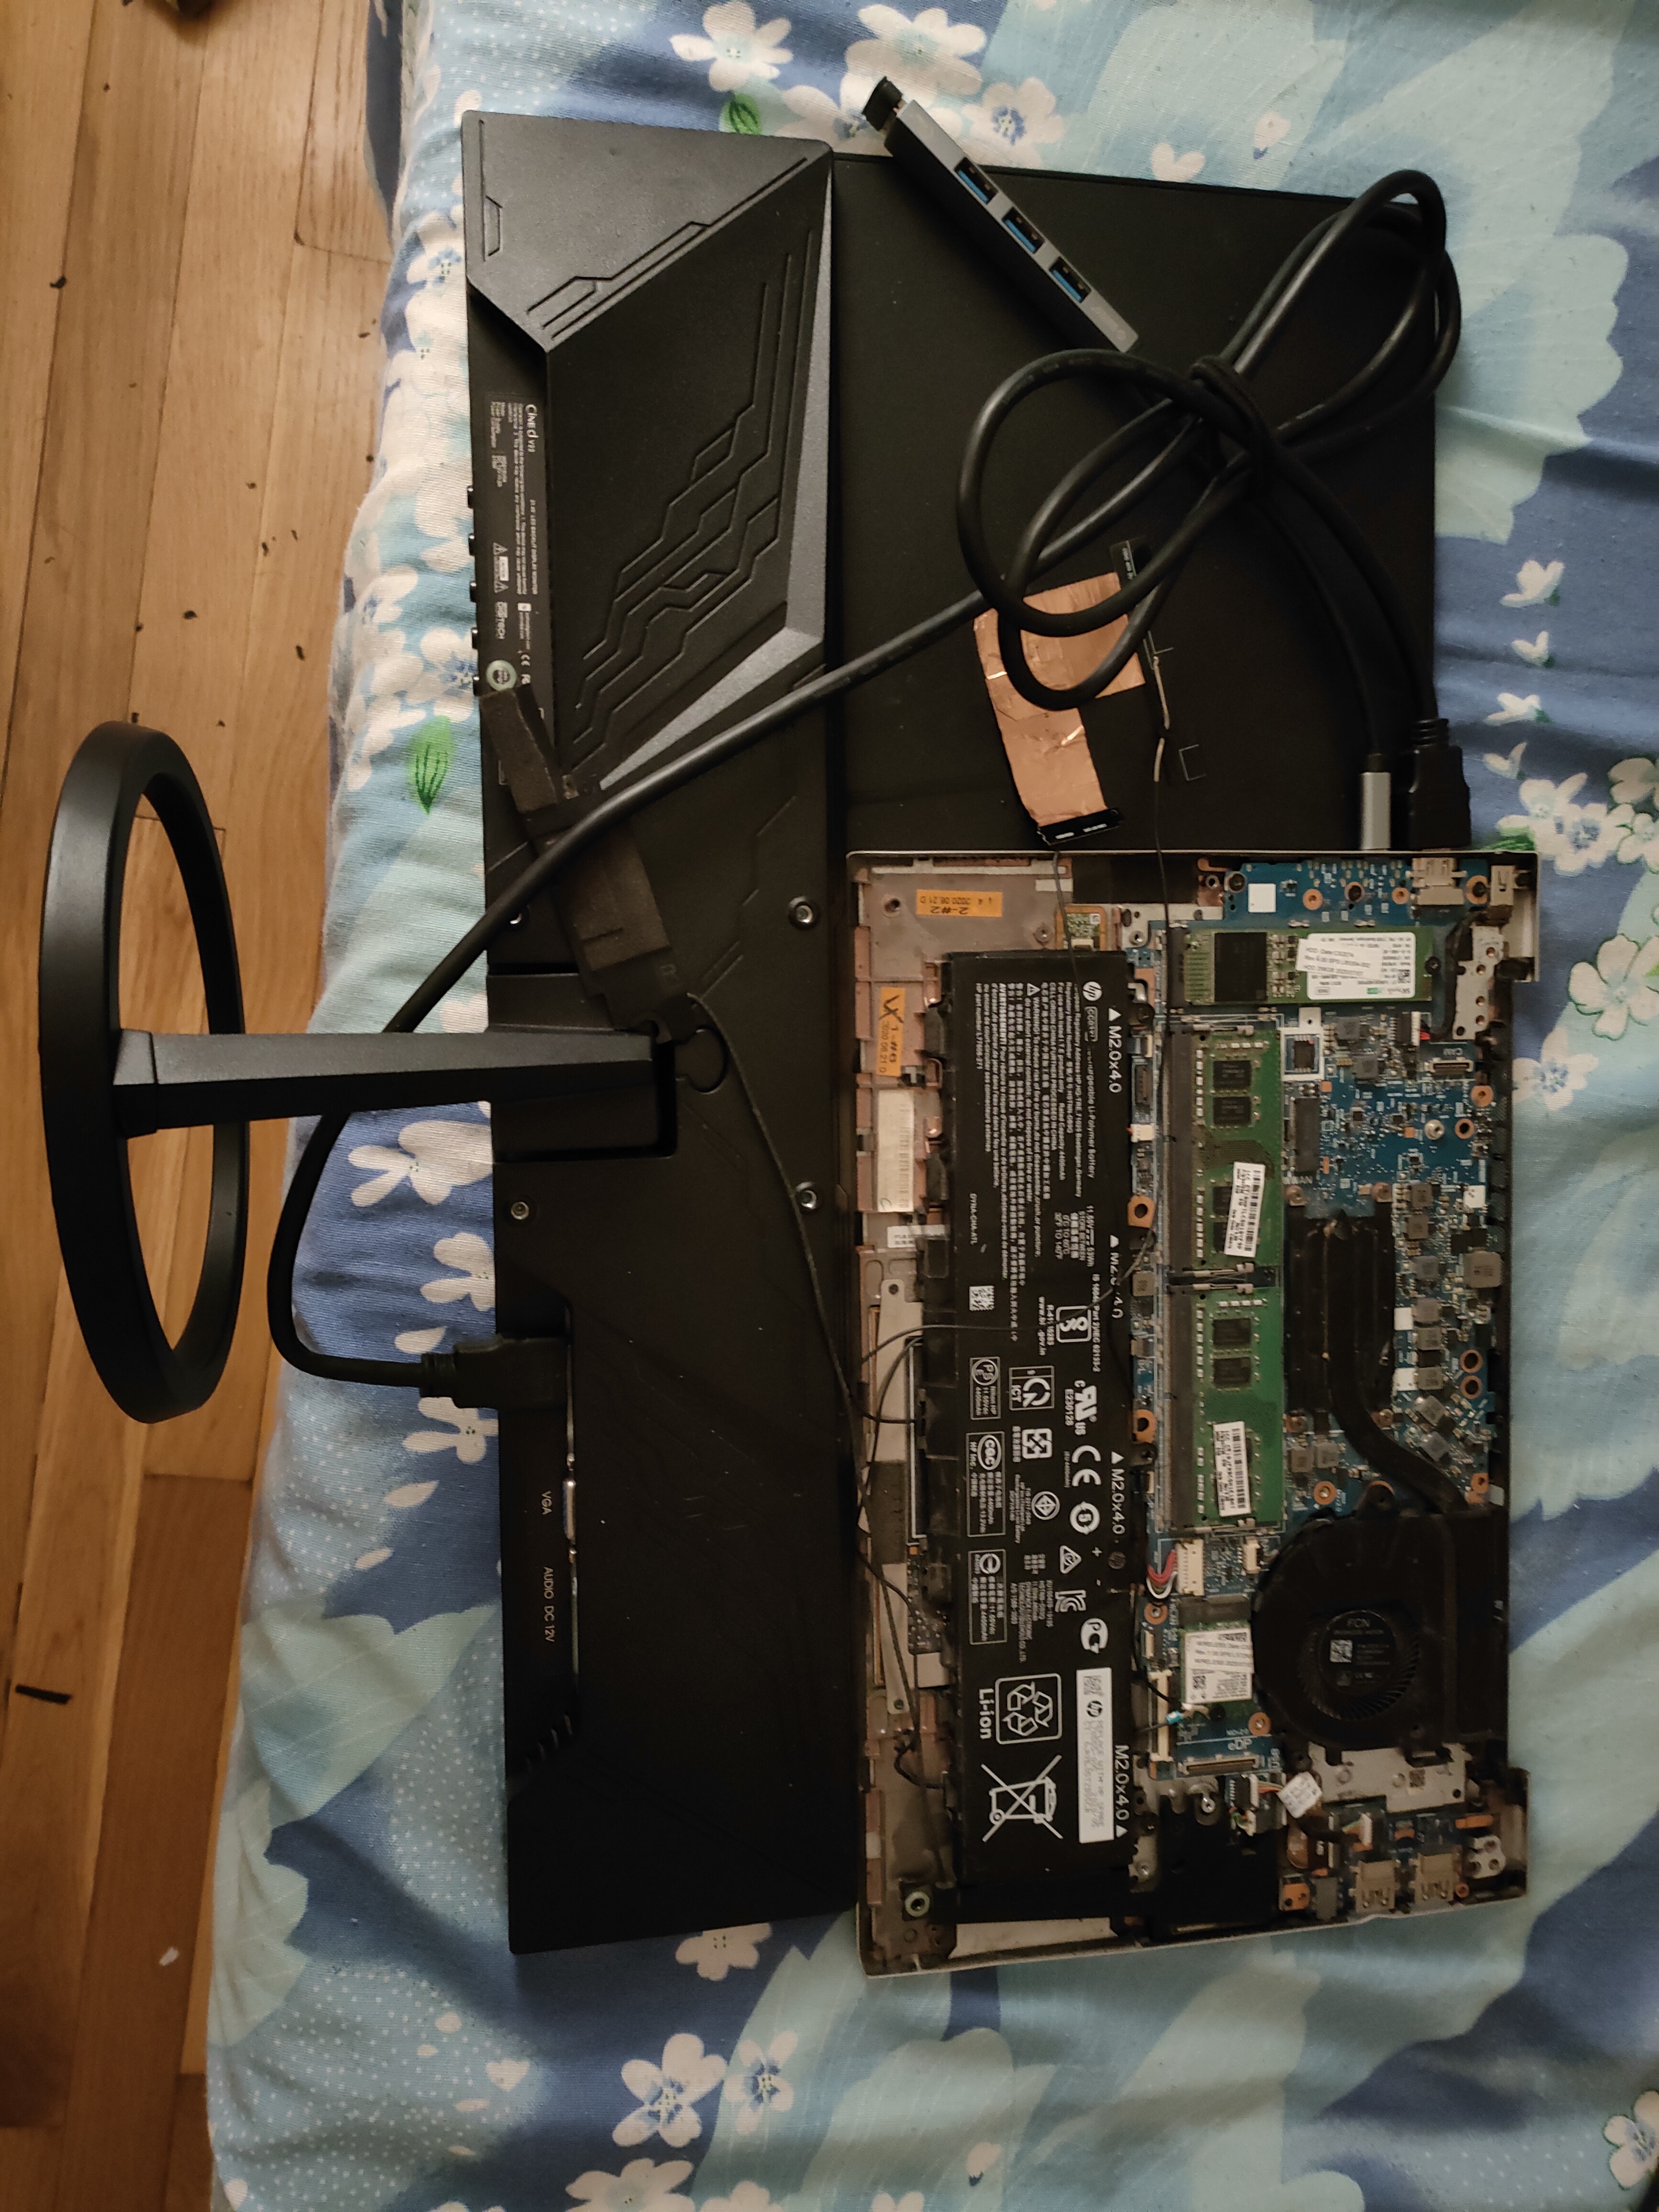
Standard bottom panel removal. Screws organized by removal order on the magnetic tray. Components laid out:
- Bottom case panel with screw bosses visible
- Internal flex cables laid flat so they wouldnt tangle
- Motherboard with cooling still attached
- Battery
- WiFi antenna - a copper-looking wire I pulled out because WiFi felt slow
The EliteBook is pretty modular for a business laptop. Standard screws, single panel access. RAM and SSD are easy to reach.
Upgrades
RAM: Maxed it out. I dont remember the exact amount but I put in whatever the board could take.
Storage: Swapped to a 512GB NVMe SSD.
WiFi: Pulled the antenna out and left it external. Signal actually improved.
The Frankenstein Part
Initially I just used the laptop closed with an external 75Hz monitor via HDMI. The cracked screen stayed shut and ignored.
Then I went further.
Removed the motherboard with CPU, RAM, cooling, and storage all still attached. Superglued the whole assembly to the back of the 75Hz monitor. Left the speakers hanging at the bottom. Connected power and display.
It looked ridiculous. It worked perfectly.
The motherboard stayed put. The speakers hung there sounding mediocre but functional. The external WiFi antenna got better reception than it ever did inside the chassis. And the 75Hz monitor felt more responsive than the original 60Hz laptop screen.
The Specs
- Model: HP EliteBook 840 G7
- CPU: Intel Core i5-10210U (10th gen, 4 cores, 15W)
- RAM: Maxed out (exact amount I dont recall)
- Storage: 512GB NVMe SSD
- Display: Originally 14-inch 1080p, cracked. Replaced with external 75Hz monitor
- WiFi: Intel AX201 with external antenna
What I Learned
A cracked screen doesnt kill a laptop. External monitors make the built-in display irrelevant.
Upgrade while its already open. Youve done the hard part of disassembling it. Might as well max the RAM and swap the SSD while youre in there.
Superglue holds motherboards to monitors. I wasnt sure it would work long-term but it stayed secure.
Travel constraints force better problem-solving. Limited tools, limited space, limited options. You figure it out or you dont.
E-waste can be avoided with unconventional thinking. This laptop should have been scrap. Instead it became a desktop that still works.
Final Word
This wasnt elegant. It wasnt pretty. The speakers dangling off the bottom of a monitor looked absurd. But it kept a perfectly good computer alive when the only thing wrong with it was a cracked screen.
The HP EliteBooks modular design made all of this possible. Single panel, standard components, everything reachable. Business laptops are built for IT departments to service quickly and that philosophy extends to weird personal projects like this one.
If you have a laptop with a broken screen, dont toss it. Slap a monitor on it. Or go full frankenstein like I did.
Project: May 2023, Dhaka, Bangladesh Status: Still functional last I checked


